 |
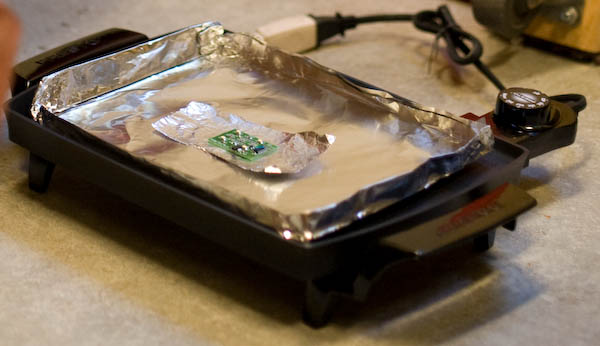
Griddle Solderingby Cathy Saxton Several years ago, I discovered (as many others have) that it's not so hard to solder surface-mount components by hand. Even small (0603) components and fine pitch (0.5mm) connectors can be done with a soldering iron with an appropriately small tip. There are a couple of key items for small-component soldering: a small pair of tweezers and a microscope. Some friends convinced me that I just had to have a microscope, and they were right! I got an AmScope "7x-45x Stereo Zoom Boom Microscope + Ring Light" from an eBay seller. Meanwhile, there's been a growing trend for hobbyists to solder surface-mount components using solder paste and a toaster oven or skillet. Until recently, I'd never been compelled since hand-soldering has always worked fine for me. But, I had a couple of components that didn't have exposed contacts, and then got to a point where I wanted to get components off of a board. So, I decided to try "skillet soldering." Many sources indicate that a skillet or hot plate works better than a toaster oven. I considered various options -- hot plates, skillets, and griddles. All of these were items that would plug in to a regular 120V outlet and would produce heat on a flat, solid, metal surface. I looked at user reviews to evaluate things like heat and cool time and evenness of heating. Based on that information, I decided that the Presto 07211 Liddle Griddle looked like my best bet. There were less expensive options, but reviews indicated that heating and cooling could take a long time. I also figured that a griddle was more likely to have even heat levels across the surface. I tested the evenness of the heat on the griddle by making blueberry pancakes (yum!). The griddle cooked fairly evenly -- as expected, areas near the heating element (which is nicely visible from the bottom) cooked a tad faster than the off-element areas, but it was a small effect. It also maintained temperature very nicely, and it heated and cooled fairly quickly. With the testing done, I was ready to try with a board! I grabbed the board that had the components I wanted to 'rescue' and put it on the griddle, turned the griddle to 400 (its top setting), and watched. In a very short time, I was able to pluck the components off the board with tweezers. I turned the griddle off and a few minutes later removed the board. I was very pleased to confirm that the griddle got hot enough to melt solder. (I had a layer of aluminum foil on the griddle; not sure whether that helped or hurt the process, but I just couldn't bring myself to melt solder onto a clean griddle even though I'll never use it for food again.) 
Next up was using the griddle to mount components to a new board. I got some solder paste from a friend (thanks Jim!) and applied it with a couple pins. It took some experimentation to get a technique that worked. The paste isn't really all that inclined to 'stick' to the board, so it needs some encouragement. Basically, I'd get a glob of paste on one pin, and then use the other pin to scoop a little dab of the paste onto the board, reloading the first pin periodically as its glob of paste ran out. It reminded me of making chocolate chip cookies. (A picture would be great here, I know, but I need to rig something up to get a picture through the microscope.) Update: I've more recently been using stencils to apply solder paste. They can be cut with a lasercutter or even a simple cutting plotter. After putting paste on the board, I added components with tweezers, then headed to the griddle. I put the board on the (cold) griddle, turned the griddle on, and watched... In about five minutes, the solder started to melt. Larger components took a little longer, probably less than a minute more, though. At that point I turned off the griddle. A couple minutes later, the solder had cooled enough that I could remove the board (with tweezers) without risking parts sliding off.
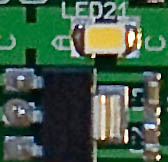
For size reference: in the photos above, the LED is PLCC-2, the voltage regulator is SOT-223, and the capacitors on the right are 0603. |
| ©2000-2026 Idle Loop Software Design, LLC. You may not copy or reproduce any content from this site without our consent. |


