|
|
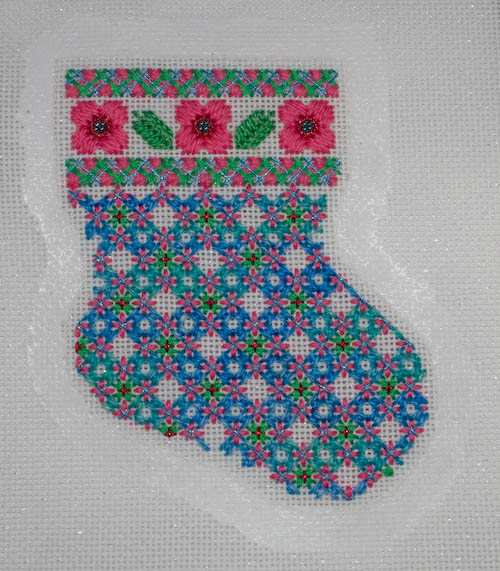
Finishing a Canvas Stockingby Cathy Saxton This page details the steps that I used to turn a "petite stocking" stitched canvas into a finished stocking. It is approximately 4" by 5". 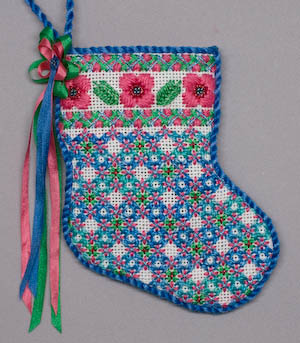
I hope you will find these instructions useful, but ultimately you are responsible for any successes or failures in finishing your needlework projects. Consider doing the steps here on a blank piece of canvas as practice before finishing your actual project, which presumably represents a lot of time and effort. As suggested above, I worked through these steps with a piece of blank canvas on which I drew a stocking outline. The photographs below are a combination of the "trial" stocking and an actual stitched stocking that I wanted to finish (which was the motivation for this project). I strongly encourage you to read through this entire page before you begin; this will help you understand how all the steps fit together. Materials needed:
A few sewing terms:
1. Stay-stitchStay-stitching helps secure the canvas and keep it from unraveling. This step may not be completely necessary, but I figured it was worth it to help ensure that the final result was as good as possible. Machine stitch outside the needlework all the way around the design, about 1/8" from the edge of the stocking shape. I used the standard stitch length on my sewing machine. For my trial stocking, I used a red thread to make it easy to see. For the actual stocking, I used a color similar to the canvas. It turns out that it would have been better to use something with more contrast. This thread is completely hidden when the stocking is complete, and it was much harder to follow the nearly-invisible stay-stitch line when stitching the underlay (step 3). 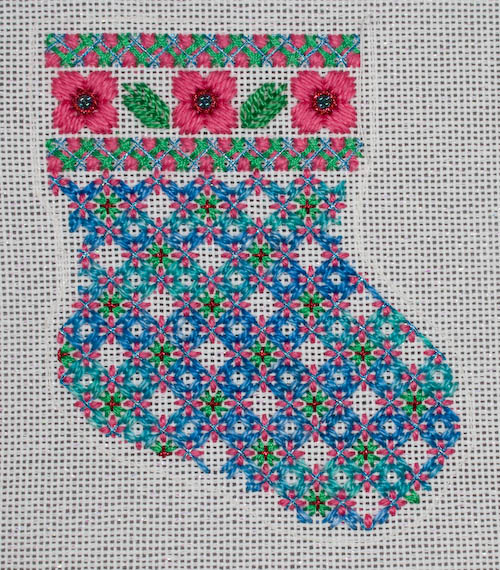
2. Glue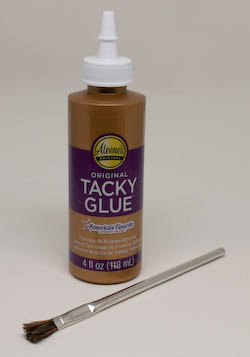
Glue helps secure the canvas threads, which is especially helpful for this project since we'll be using small seam allowances. Paint glue onto the canvas starting at the stay-stitch line and extending out at least 1/4". I used Alene's Original Tacky Glue and an epoxy brush. The brush was wider than I needed, but the stiffness of the bristles worked quite well for applying the glue to the canvas. When you paint, work the glue into the canvas. As a side effect, some glue will leak through the holes in the canvas and get onto the surface underneath, so put several sheets of clean white paper under the canvas for this step. I put newspaper underneath the stack of paper. After painting the canvas, I very gently peeled the canvas away from the top sheet of paper (which had glue that had gone through the holes of the canvas) and placed the canvas on a clean sheet of paper to dry. Wait for glue to dry completely before proceeding. This took a few hours (in warm weather); it was still damp after an hour, but dry at three hours. 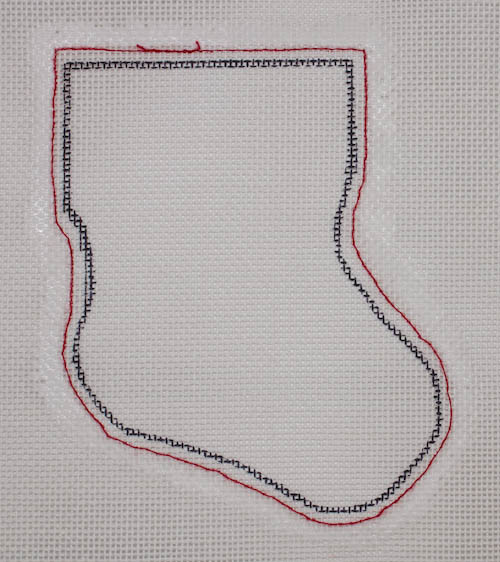
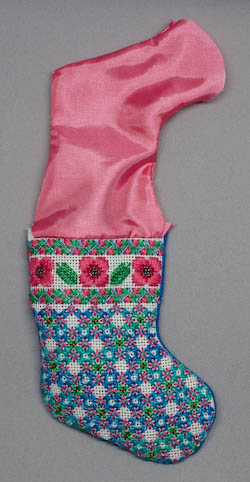
3. UnderlayThe underlay provides a nice background behind unstitched areas of canvas. The design doesn't look as nice with the pink lining fabric showing through the canvas, so I used a cream-colored fabric for the underlay. If you don't have exposed canvas, you can skip the underlay, but it might still be good to stitch the line described below to secure the canvas threads and provide a clear line for stitching the canvas to the backing fabric. 
Cut a rectangle of underlay material that's large enough to cover the stocking and stay-stitch line. The underlay fabric will be cut in the next step, so there's no need to shape it now. Put the underlay behind the canvas (be mindful of which side of the underlay is visible through the canvas) and pin the underlay fabric to the canvas. 
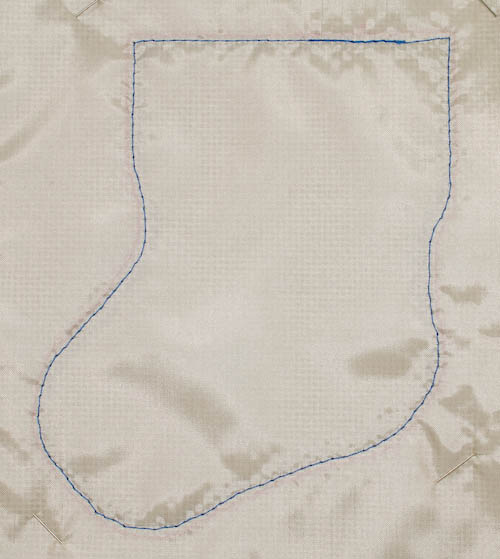
Stitch the underlay fabric to the canvas, slightly inside the original stay-stitch line, maintaining a consistent distance from the edge of the design. Stitch all the way around the stocking. This is shown in blue thread in the photo of the trial stocking below. This stitch line will be your guide when joining the canvas and backing fabric together (step 6), so choose a thread color that contrasts nicely with the underlay fabric. For my actual stocking, I used a thread that matched the color of my canvas and underlay. That made it quite challenging to follow when stitching the seam in step 6. Learn from my mistake and choose a thread that is clearly visible! The thread you will use for the seam in step 6 might be a good choice. 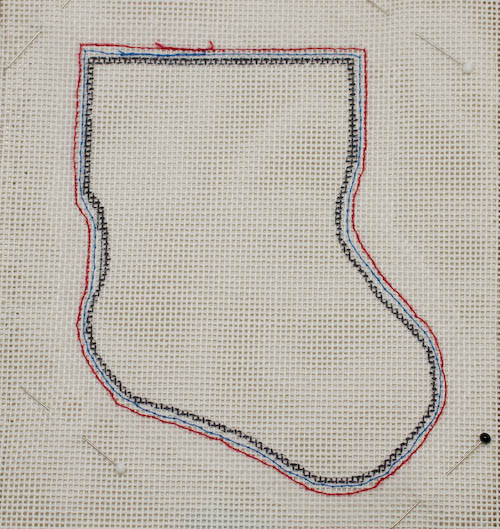
4. Trim SeamsTrim the canvas and underlay. Leave about 1/2" seam allowance at the top, and about 1/4" outside the edge of the rest of the design (1/8" outside the initial, outer-most stitch line). The extra at the top is because turning is a bit hard on the material in that area. Note that the photos here do not show the larger seam allowance at the top since I revised my technique after this. 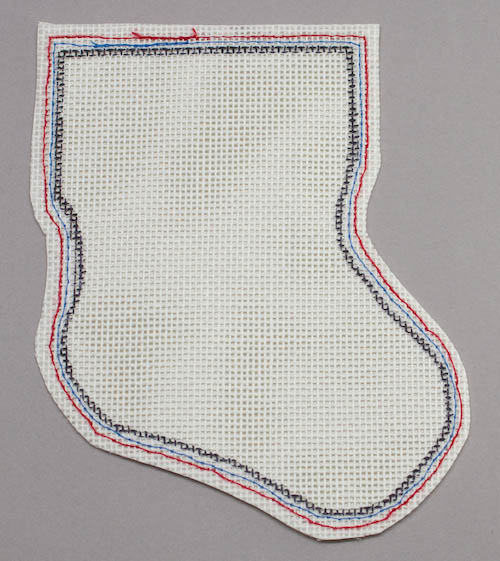
Note that it's harder to see where the outermost line is on the photo below since that stay-stitch line uses thread that matches the canvas; as mentioned above, a contrasting thread would be better, and it won't show in the finished product. 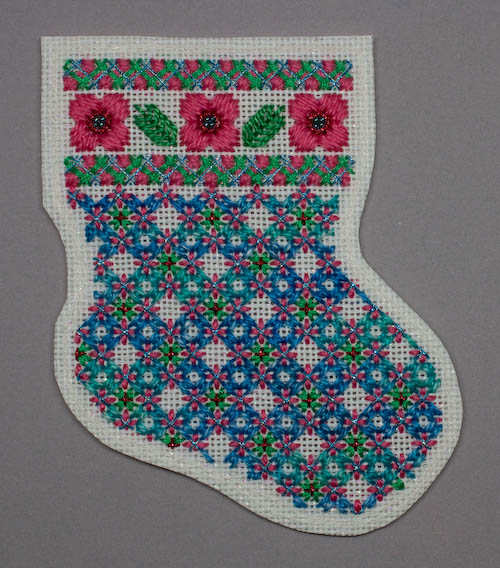
5. Cut Backing FabricSpread the backing fabric on a table, right side up. Lay the canvas on the backing fabric, with right sides together. (In step 10, we'll turn so the right sides are on the outside.) Pin to hold it in place. Cut the backing fabric, following the outside edge of the canvas and underlay. 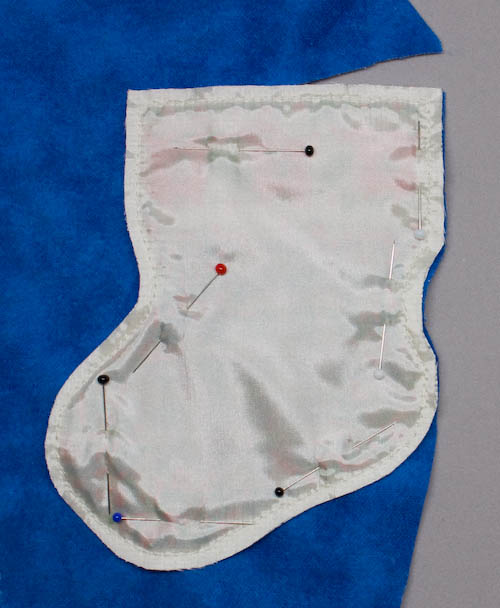
6. Join Canvas and Backing FabricStitch just inside the underlay stitch line, starting even with the top of the design (~1/2" from the top edge of the canvas) and stitching down the side, around the toe, and up the other side, ending at the top of the design. Secure both ends of stitching (e.g. by back-stitching a few stitches). The photo below is my trial stocking. In this photo, the outer line of stitching is the underlay stitch line (from step 3). Note that the seam stitched in this step (the inner line) does not go across the top of the stocking. 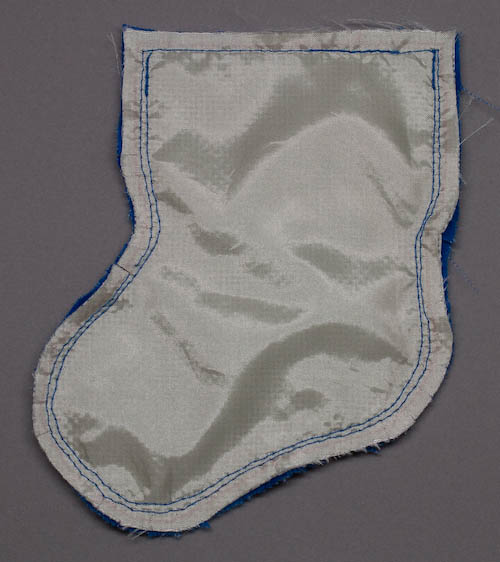
For strength, it is a good idea to stitch this seam a second time. Take this opportunity to check whether there is bare canvas showing between the design and seam. I was able to check this without fully turning the stocking, looking inside and pushing in from the outside to see how the seams looked. I still had a small amount of canvas showing, so I stitched my second line inside the first. If your first line is good, stitch the second one just outside it. The photo below (of the "real" stocking) shows both stitch lines from this step in blue. If you look carefully, you can see a cream-colored stitch line outside them; this is the underlay stitching (from step 3), and is what provides the guide for the stitching for this step. It would have been a lot easier to follow this line if it had better contrast. 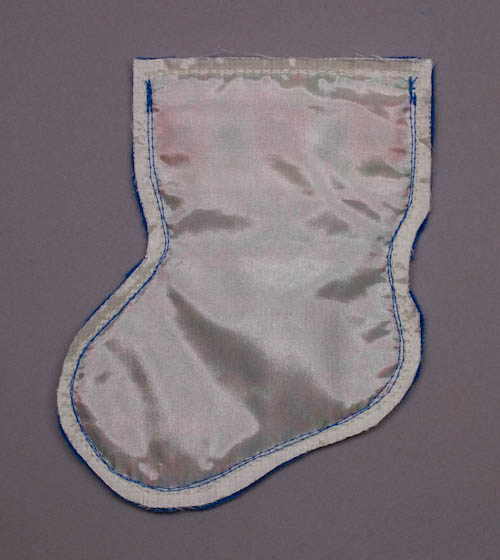
7. Cut Lining FabricStack two pieces of lining fabric (or fold a larger piece), right sides together. Put the canvas+backing on the lining and pin to hold it in place. Cut the lining fabric, following the outside edge of the canvas and underlay. 
Remove pins one at a time and reposition to hold the two lining pieces together without the canvas. 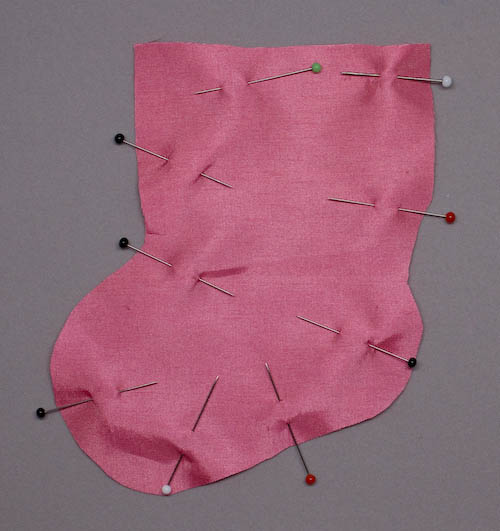
8. Sew LiningA couple things to note:
Measure the distance from the edge of the canvas to the seam joining the canvas and backing fabric. You'll want to start with that size seam allowance, but then move in, creating a larger seam allowance once you get an inch or so from the top. This will help the lining fit smoothly inside the stocking. My canvas+backing seam was 1/4", and I used a 3/8" seam allowance for the lining (after the top inch). Starting about 1/4" below the top of the design (~3/4" from the top edge of the canvas), and with a seam allowance that matches your canvas (1/4" in my case), stitch down the back of the sock, increasing your seam allowance a bit (e.g. to 3/8") after the first inch or so. Do not secure this end of the stitching; this will let you adjust the side seams to match the opening of the canvas+backing. Stitch around the heel and along the bottom, and end the stitching securely when you get to the toe area. See the photo below. Start another line of stitching on top of the toe, securing this end. Continue stitching toward the top of the stocking, decreasing the seam allowance (back to 1/4") as you reach the top. Stop stitching ~3/4" from the top, and do not secure this end. Trim the seam allowance close to the stitching (decreasing from 3/8" to 1/8" or so) to help the lining fit inside the stocking without being too bulky. 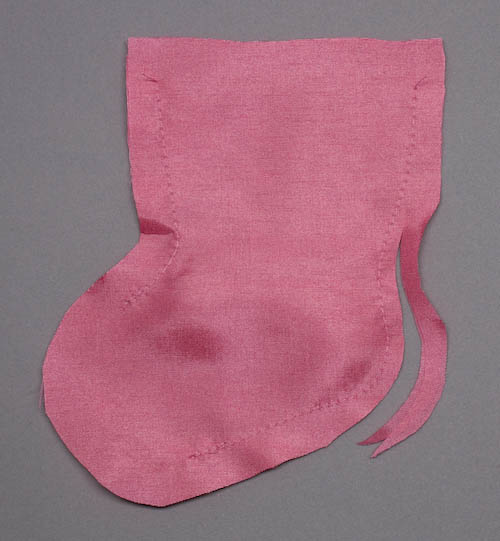
9. Clip the CurvesAlong each curve (both concave and convex) on the canvas+backing piece, make several small snips perpendicular to the edge, spaced a little apart. This will help the fabric lie flat when it is turned right-side out and the seam is inside. In the photo below, a few of the snipped sections have been lifted to improve visibility. There are snips all down the right side. 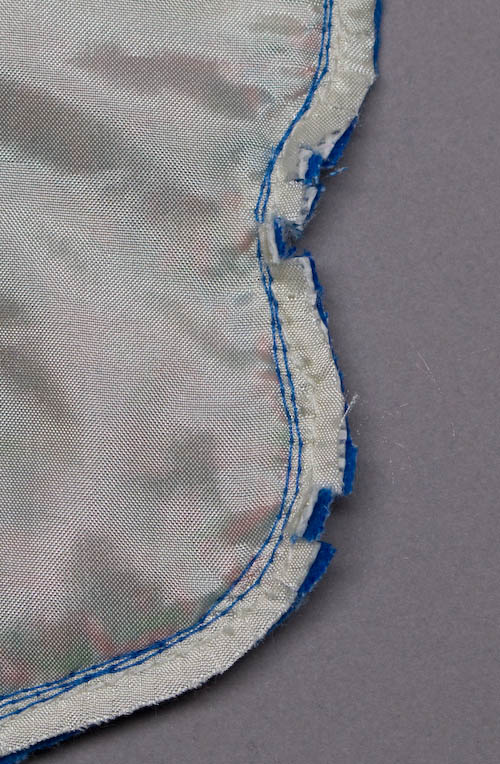
It is not necessary to clip the curves of the lining since it is not turned. 10. Turn StockingIt's funny, this is usually just part of the stitching-together step and is given as a simple instruction, "turn," but it turns out to be quite challenging for such a small stocking. I found that the technique that worked best for me was to fold a small bit at the top, as if I were making a cuff at the top of a sock, then gradually turn the fabric out at that fold, essentially increasing the size of the cuff. 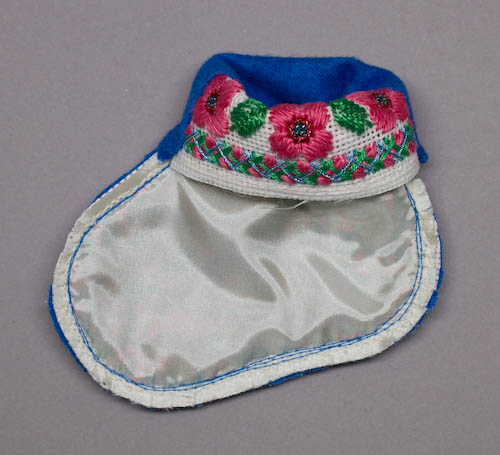
This is your last chance to make any adjustments to the seam. Check that the shape is good and look for any places where excess canvas is showing. Make adjustments as needed (turn to expose seam, stitch, and turn again). After I completed turning, I was able to get my (small) hands inside the sock to smooth out the curves; a small dowel, (unsharpened) pencil, or chopstick might also be helpful for this. Press the seams. I used a low heat (3/10), put the canvas face down on a thick white towel, and ironed from the back. 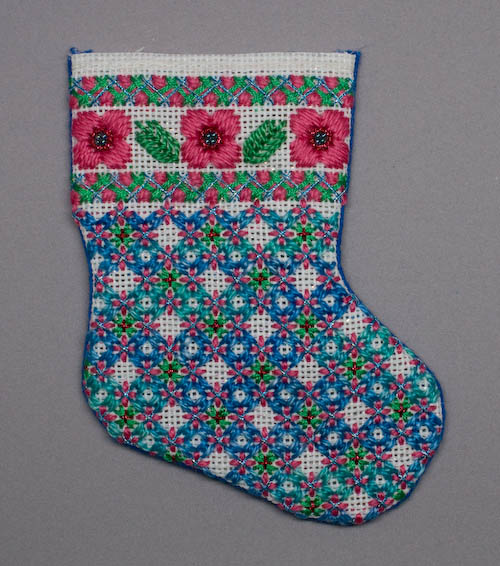
Do not turn the lining. 11. Final JoinMeasure the distance from the top of the design to the edge of the canvas. This is the seam allowance that you'll use when stitching the lining to the stocking. Put the canvas+backing inside the lining. The right sides will be together – canvas and backing are right-side out after turning; lining is still as stitched with right sides together. Adjust so that the top edges match and the seams are aligned. Pin the center of the canvas to the center of the lining, then place additional pins along the top edge, making sure that the lining is flat against the canvas. Repeat with backing fabric and its lining. 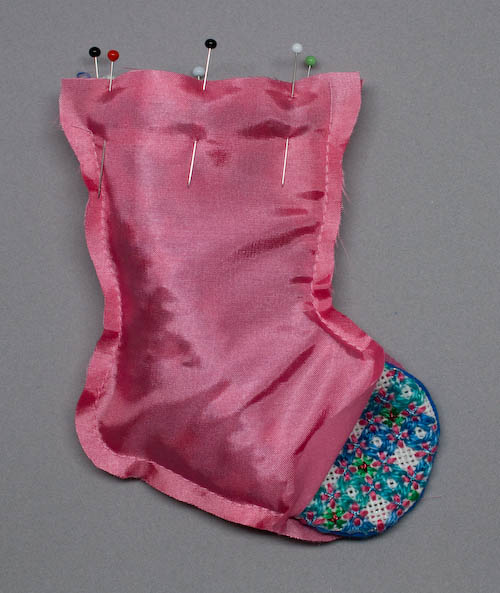
Stitch along the top edge of the canvas, using the distance measured above as the seam allowance. Leave about ~1/4" unstitched at the beginning and end; you'll insert the ends of the twisted cord in the resulting holes. Secure both ends of the stitch line. Repeat to join the backing fabric and lining. This step is a little tricky; it can be hard to machine sew such a small opening. The technique I used was to stitch from the inside of the opening at the top of the stocking: I placed the stocking with the canvas surface face down on the machine, so that the underlay was face up, held the backing+lining (top layers of the stocking as resting on the machine) out of the way, and stitched through the underlay, canvas, and lining. 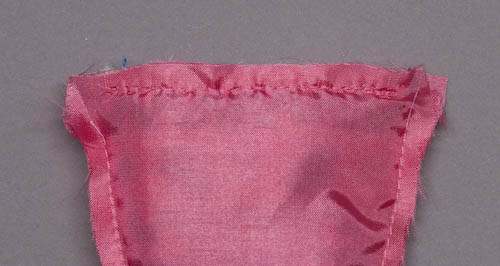
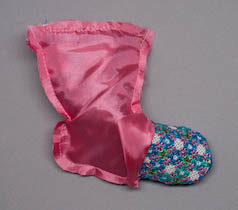
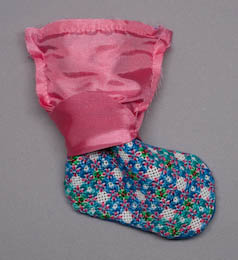
12. Turn LiningGently pull the lining up. The canvas will go through the hole in the toe.
Stitch closed (by hand) the opening in the toe. Push the lining inside the stocking. Press. 13. Twisted Cord TrimI used nylon thread to attach twisted cord. Regular thread supposedly breaks after being pulled through canvas repeatedly. Some instructions say you can glue the cord, but I didn't try that; I felt that I was able to get it securely attached with needle and thread. Insert one end of the twisted cord into the space between the lining and the canvas/backing at the top right edge of the stocking (the side above the toe). Fasten the cord into place. I stitched it to the canvas, just inside the seam. Attach the cord to the stocking along the seam, stitching into the canvas to hold the cord securely. Once the cord was fastened inside the lining and attached to the upper part of the side, I stitched the lining closed around the cord, sewing the top of the lining to the top of the canvas and backing fabric and then completing the upper portion of the lining seam. (I found it convenient that this was finished when I was attaching the cord around the top of the stocking.) Do not stitch closed the hole on the left side; you still need to use it! 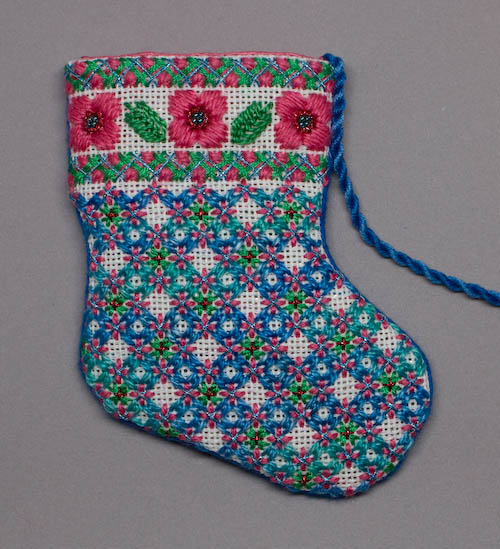
At this point, I pulled the lining away from the inside of the stocking so that I didn't risk catching the lining while I was sewing the twisted cord to the stocking. Route the cord down the right edge of the stocking, around the toe and heel, and up the left side. 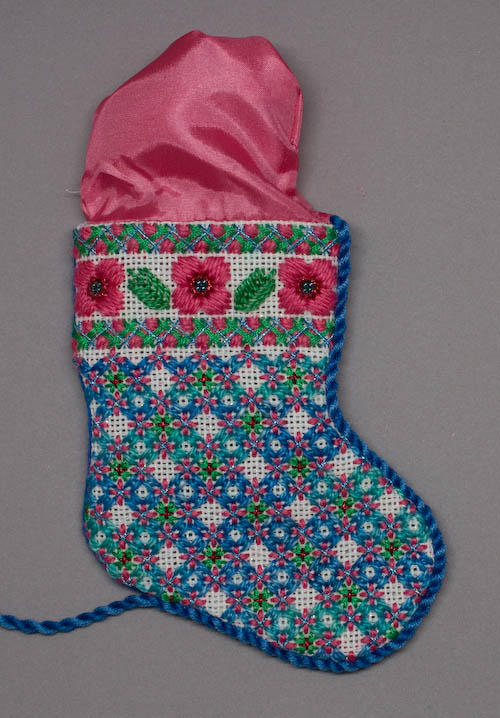
Put the lining back into the stocking, then continue attaching cord all the way around the top of the stocking, canvas side first. 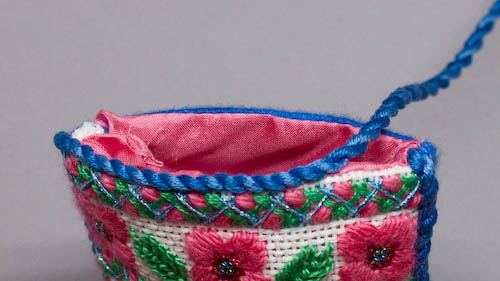
Secure the end of the cord into the space between the lining and canvas/backing at the left edge of the stocking (the side above the heel). Make a loop of cord to use for hanging and secure its ends in this space as well. Note: I didn't end and restart the twisted cord between the trim and loop; I just fed a bit into the lining-canvas gap, essentially making a small loop inside the gap, and fastened it securely. That small loop is below the top seam, so the cord appears to end and then restart for the hanging loop. Stitch the lining closed around the cord: sew the top of the lining to the top of the canvas, cord, and backing fabric, and complete sewing the upper portion of the lining seam. 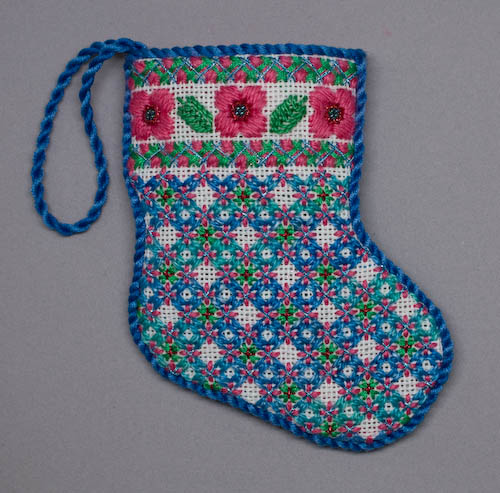
14. EmbellishAdd bows, streamers, tassel, bells, charms, etc, as you desire. 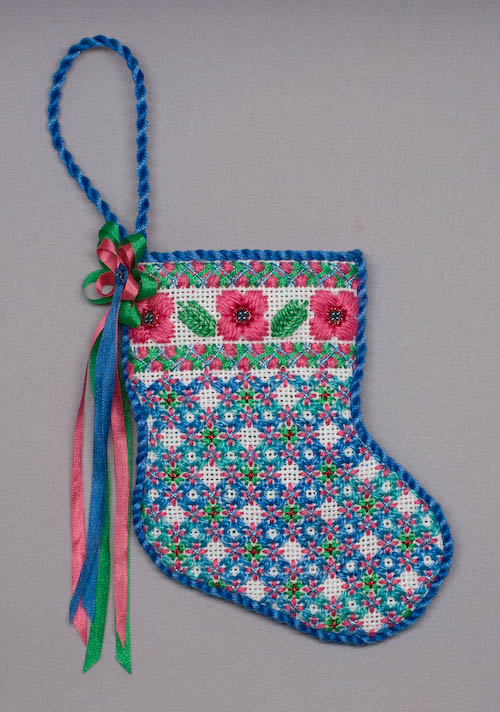
AcknowledgementsI gleaned techniques and strategies from several resources. It is thanks to the following people and publications that I was able to learn the finishing process that I show on this page.
|
| ©2000-2026 Idle Loop Software Design, LLC. You may not copy or reproduce any content from this site without our consent. |