 |
Pfaff Presser Bar RepairOctober 28, 2023 The presser foot on my Pfaff Quilt Expression 2044 was slow to descend and not pressing down well, as if it had a weak spring. It turned out that the original oil for the presser bar spring had become a sticky, gooey mess. This page documents how I disassembled the machine to get to the presser bar spring so I could diagnose the problem and clean the spring. The presser foot now lowers smoothly and has good, strong pressure. Disclaimer: These are the steps that worked for me, but I make no claim that they will work for others. Please be aware that doing any of this may void your warranty, and proper operation of the machine may be affected if it is not reassembled correctly. Proceed at your own risk. Tools / materials that I used:
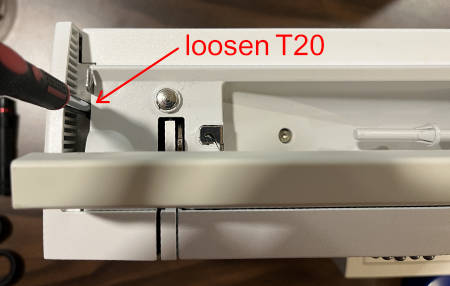
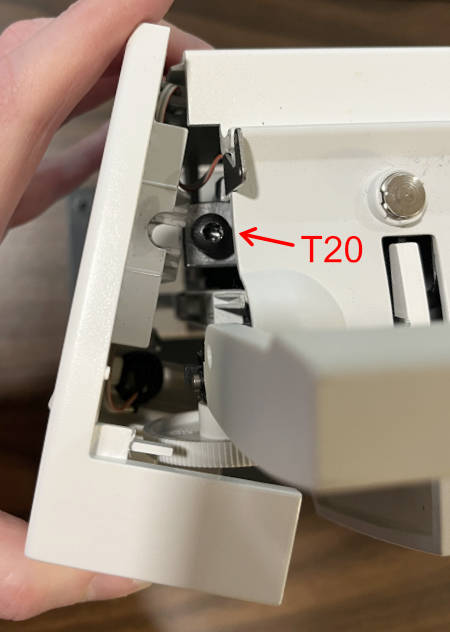
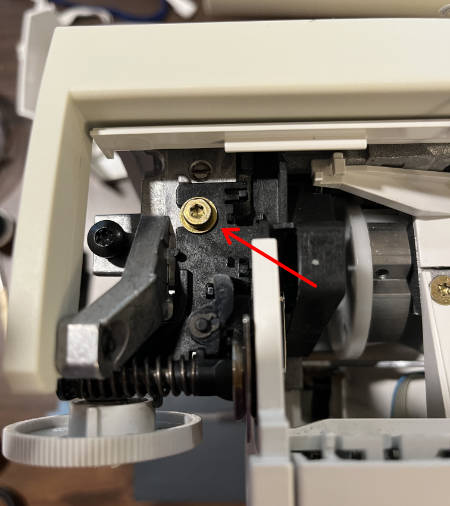
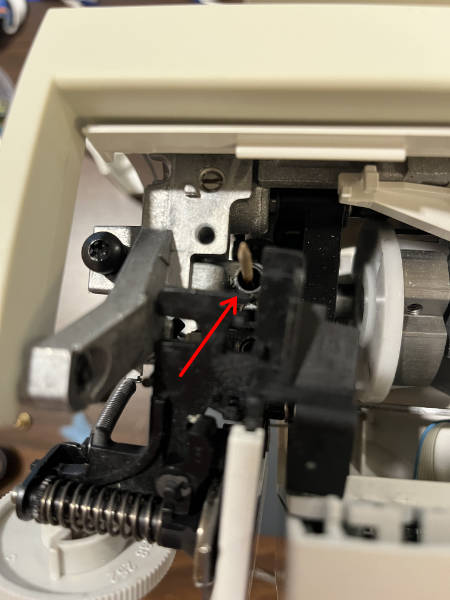
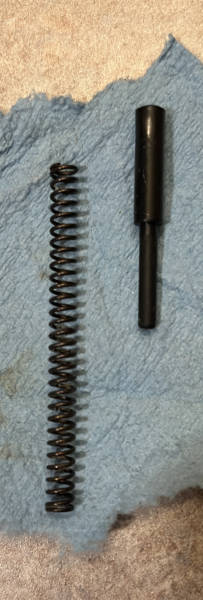
StepsThe plate that covers the spool of thread (and has the stitch legend on the inside) is connected to the machine at the hinge / pivot points; there is a metal pin on the plate that is held in a small hole in a metal piece connected to the machine (on each side). Lift the lid, then press the metal piece on the machine gently away from the cover so the pin comes out of the hole. Flip the handle up to access the screw that fastens the side cover. Use a T20 Torx screwdriver (shown in the photo) to loosen it – no need to remove – so you can slide off the plastic side piece. Use a T15 Torx screwdriver to loosen the screw holding the light bulb in place, then carefully remove the bulb and place it in a safe location that won't strain the cord. (Make note of how the cord routes through the guides for when you reassemble this.) Use a T15 Torx screwdriver to remove the two screws holding the top plastic piece to the machine. Lift this piece up and remove it. (The side panel is still attached in this photo.) This is what the side looks like. #1 is the T20 screw loosened in order to remove the side cover. #2 is the presser bar. Loosen the T15 screw, #3, located slightly behind the spring; this is one of two screws securing the piece that covers the top of the presser bar shaft. From the top of the machine, on the left side, remove the gold-color T15 screw (near center of photo) holding the black piece in place. Carefully move the black piece forward and up to expose the top of the presser bar shaft, which is slightly forward and right of the screw you just removed. Do this slowly so the pressure on the spring is released gradually. I needed to turn the handwheel to move the take-up lever to a better position; it extends into the slit in the front of the black piece. Once the black piece is out of the way, you should see a spring and plunger in the top of the presser bar shaft. The photo below shows its location, marked with a toothpick (after I removed the spring). It took some persistence to get the spring removed from the shaft. I gently pulled up on the spring multiple times until it finally popped loose. It and the plunger were very gummy. I cleaned the plunger and spring with alcohol; then soap and water, rubbing away the sticky mess with a towel; then cleaned again with alcohol (to help make sure the parts were dry to avoid rusting). I put a toothpick in the shaft and swirled it around to see if there was any more gummy stuff that would come out; nothing visible stuck to the pick, but it was slightly sticky. I put a little oil on the spring and plunger, inserted them into the shaft, added a few more drops of oil, then pushed down on the plunger-spring assembly a few times to help distribute the oil. Reverse the steps above to put it back together. ResourcesIn my research, I found several pages with information that helped me discover what needed to be done, but none with photos of this specific issue.
Text descriptions that guided me:
This page has photos for partially disassembling a slightly different model of Pfaff: |
| ©2000-2026 Idle Loop Software Design, LLC. You may not copy or reproduce any content from this site without our consent. |
